
In a previous post we showed you how to add image inside text in PowerPoint to create eye-catching headings. Another very good way of highlighting your headings is to use an image as a background for your text. By following a few easy steps, you can add image as text background in PowerPoint. This can be done while retaining your original background design. Here is how you can do all that in a few easy steps.
Add Your Text & Make it Legible Enough for Your Audience
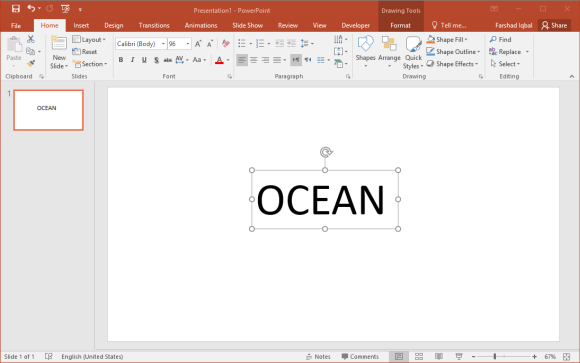
In the first step, add text and enlarge it to ensure that it is legible enough. You can use large font sizes to ensure your headings and subheadings stand out before your audience. Large text can be helpful in conveying a message to an audience in fewer words.
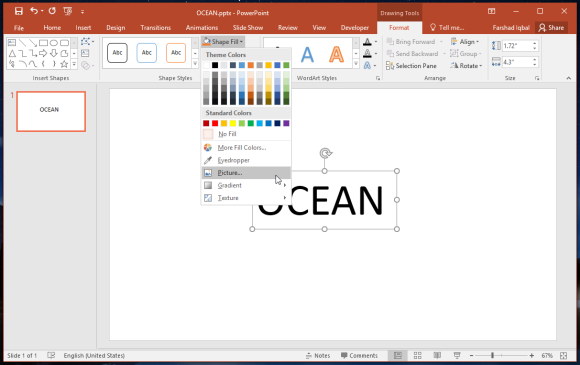
Use Shape Fill to Add a Picture
Now, select the text, go to the Format tab in PowerPoint, select Shape Fill and select a Picture to fill as your text background.
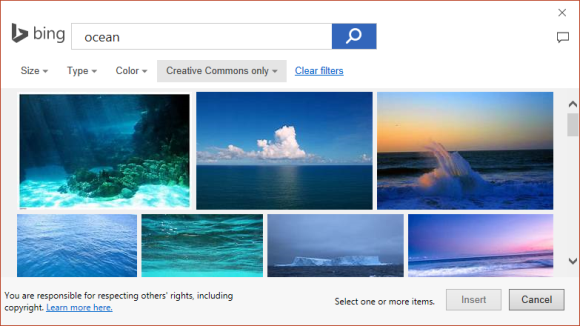
Select Image Source
Shape Fill in PowerPoint 2013 and later editions like PowerPoint 2016 will provide you with the option to select a picture from either your computer or from an online source such as Bing or OneDrive.
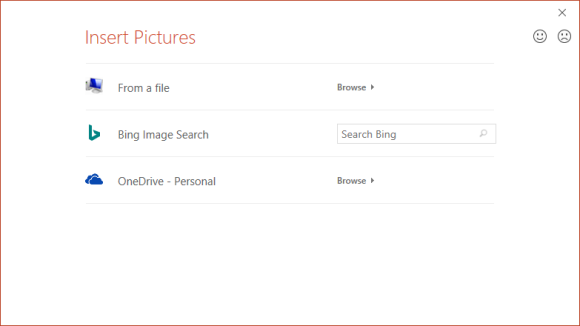
Select Image for Your Text
You can search through Bing, use OneDrive or your computer to pick an appropriate image. Select Insert to add the image as your text background.
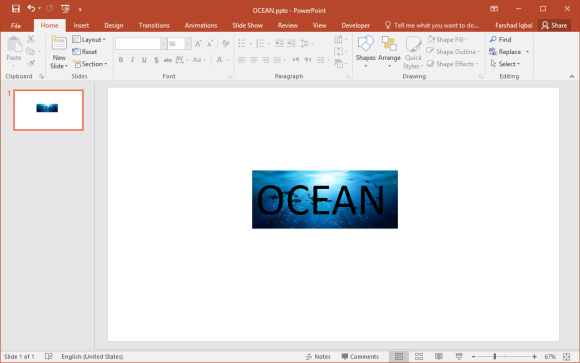
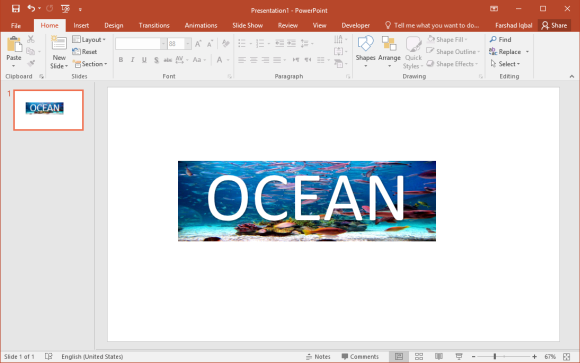
This will Add the image as a background for your text. You can also resize your text, change your font and make other necessary adjustments as per need to adjust your text even after the background image has been added.
Adding an image to highlight your text can be a great way to create attractive headings and captions. You can also experiment around with animations to animate your text to make it even more visually appealing.
Leave a Reply